People’s guesses as to what the game was going to be and what they thought of the new game, Block Party!™ at the LA FTC Regional Kickoff.
Category: Miscellaneous
Various things that we’ve found helpful or interesting
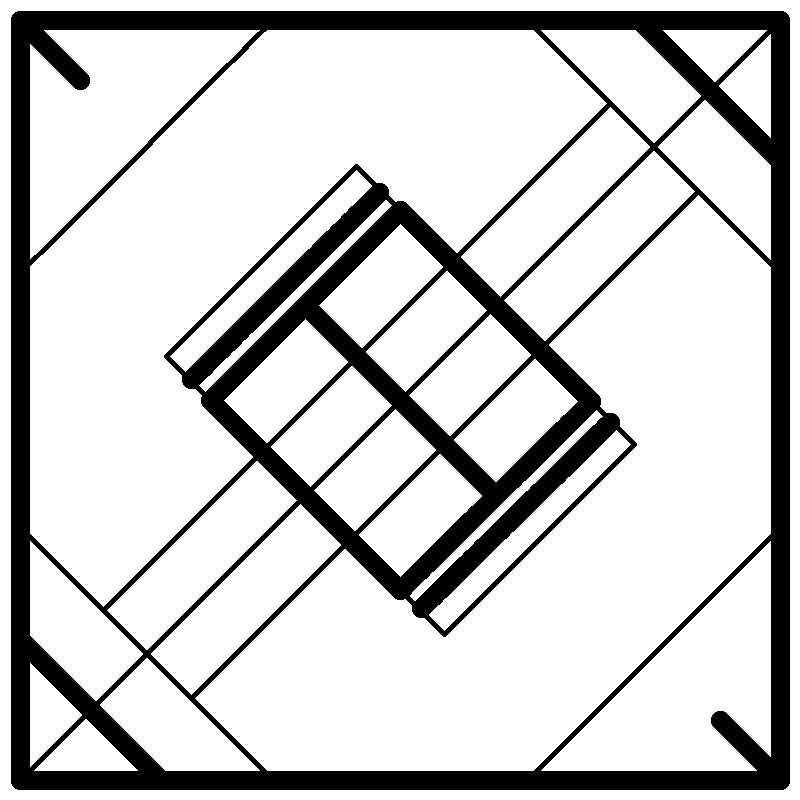
Field Drawing of Block Party!
This is a drawing of the field for the new game, Block Party!. The thin lines represent tape lines and the thick lines represent the borders for field elements. You can use it to plan your autonomous programs and do TeleOp strategy.
Download here
2013 Kickoff Hints
Some game hints we found on the FTC blog and social media accounts:
- hit the ground running
- football
- drums up
- navigate
- rolling right
- heavy lifting
- slam dunk
- basketball
- FRC 2012
- shoot
EDIT: 30 Aug 2013
- weight
- preconception of gameplay
- measuring stick
Bill of Materials Template
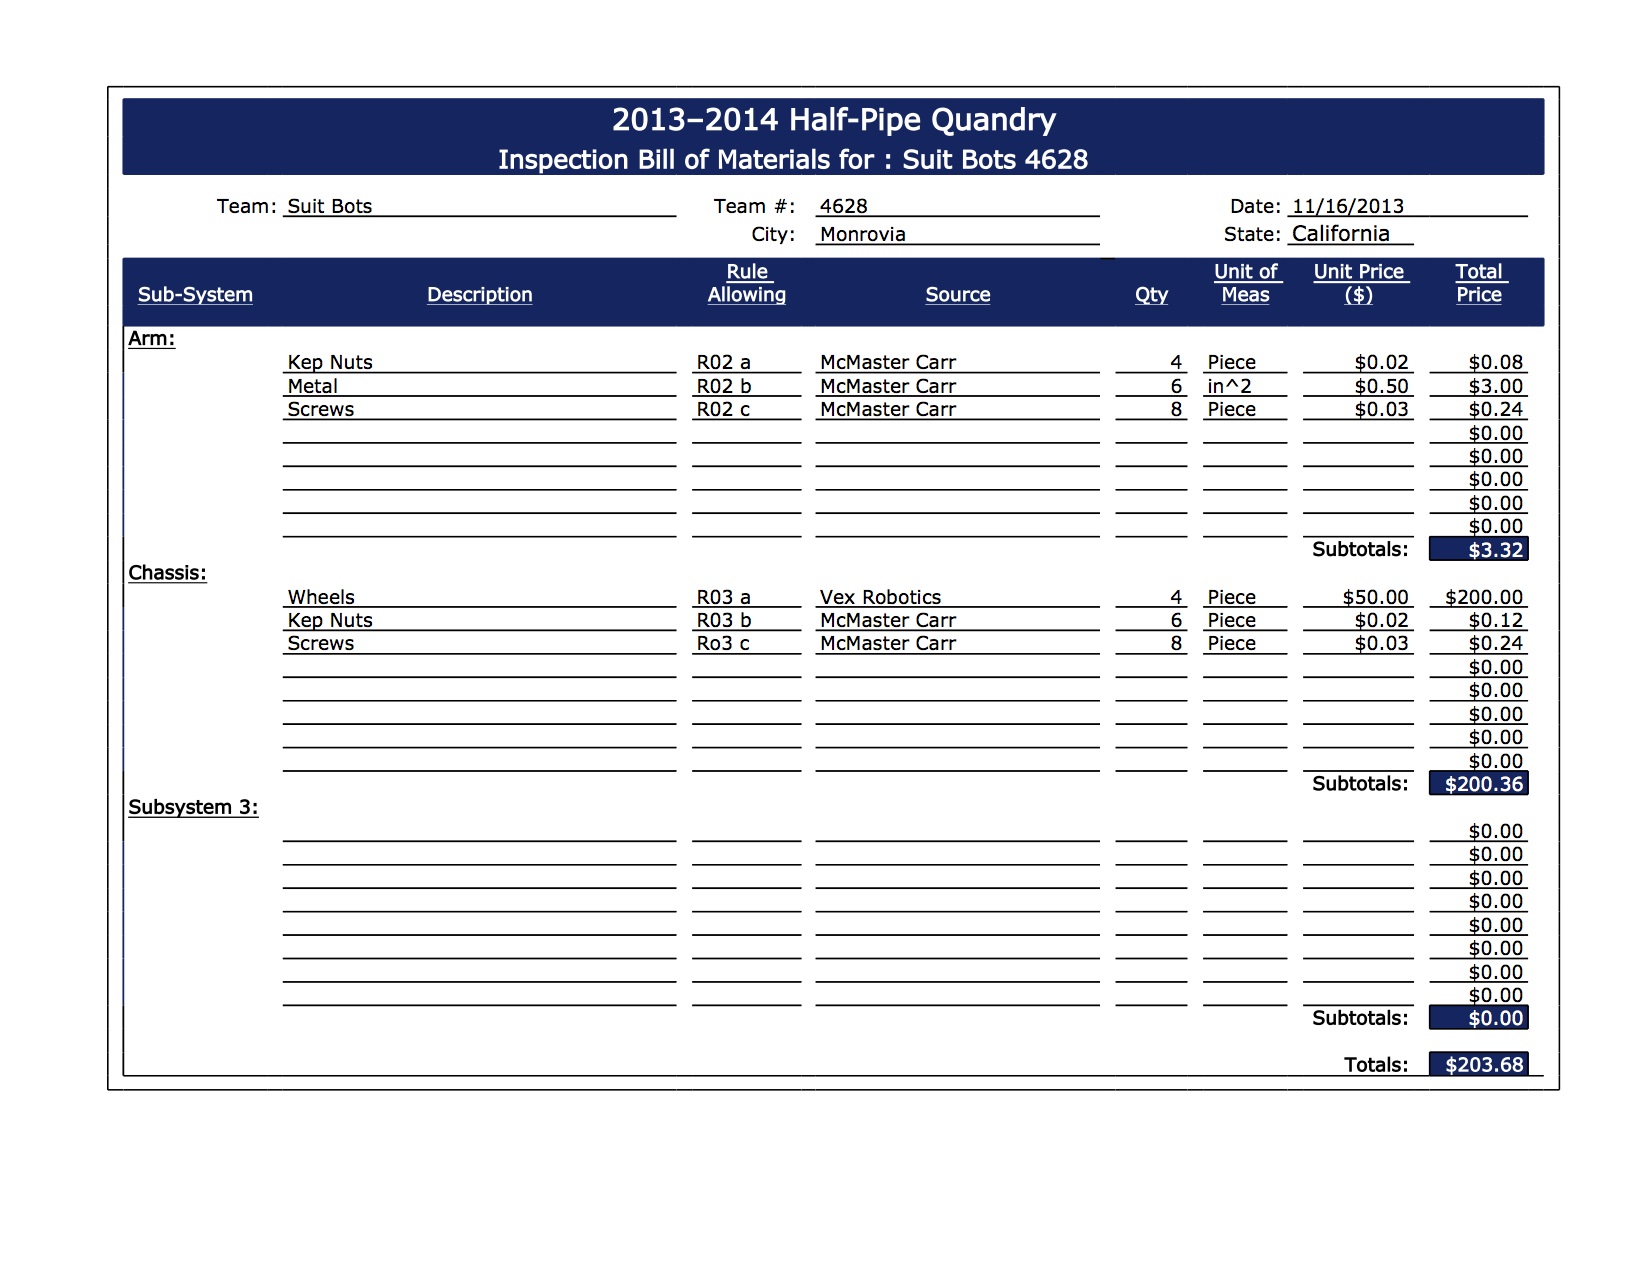
At all your hardware inspections, you must present a bill of materials (BOM) to the inspectors to ensure that you are complying with all the FTC rules regarding materials. The bills of materials for different teams can range anywhere from a nicely-typed spreadsheet to a quickly-handwritten-on-the-way-over bill (both of which we happened to use this year). Because the judges, in addition to the inspectors, will be seeing your BOM, you probably want it to look nice and like you put time into it. FRC has this problem solved by having a template for their BOM. We’ve taken their template and tweaked it a bit.

In it you’ll note that each subsystem has it own list. FTC doesn’t require that you do this, in fact, the only parts of this BOM template that are required are the part name and the rule allowing it. The reason that the rest was added is so that it can be a more effective BOM. The purpose of the bill of materials is that if somehow part of your robot disappeared, you’d be able to get all the parts for it. Having the subsystems separated will let you look at that subsystem and see exactly what parts you used for it. Having the source, quantity, unit of measure, and price make it so that you don’t have to go through the hassle of finding how big or how many parts you, and you don’t have to search for the good deal you found initially. Furthermore, if judges see this BOM after a day of handwritten ones, they’ll love it.
Here are links to templates for this BOM:
BOM_pdf — PDF document
BOM_xlsx — Microsoft Excel
Custom Joystick Controls
RobotC recently added a feature to their IDE where you can reassign the values of the following variables:
joystick.joy1_y1
joystick.joy1_x1
joystick.joy1_y2
joystick.joy1_x2
joystick.joy2_y1
joystick.joy2_x1
joystick.joy2_y2
joystick.joy2_x2
From the wizard in Window>Configure Joysticks, you can choose a controller and assign the value of one of these variables, say joystick.joy1_x1, and set it to one of the values for another variable. joystick.joy1_x1 can be assigned to the value of the right y-axis and joystick.joy1_y2 can be assigned to the value of the left x-axis. At first glance, this feature seems rather unhelpful, but if you find that it’s easier to think of the right joystick being joy1, then you can switch the values. It’s also helpful if you are using controllers that have joysticks with 3 axes of motion, you can make one of the existing variables be the left z-axis.
Although this could be useful, it will not be for FTC teams, because we may not use it due to the way the field control software works, but FRC teams may use it, making the world of 3-dimensional joysticks more easily accessible.

